
Homemade dinner rolls are one of the most comforting breads you can bake at home. These soft, pillowy rolls rise beautifully, hold their shape, and deliver a rich aroma the moment they come out of the oven. They are perfect for weeknight dinners, holidays, potlucks, or anytime you want warm, fresh bread without the effort of a full loaf. With simple ingredients and minimal hands-on time, you can achieve bakery-quality results right from your kitchen.
Why You’ll Love This Homemade Dinner Rolls Recipe
- Incredibly soft and fluffy texture that rivals professional bakeries
- Simple, accessible ingredients you likely already have at home
- Quick rise time and easy kneading make it beginner-friendly
- Versatile enough to serve with soups, roasted meats, or sweet spreads
- Beautiful golden-brown tops thanks to a silky egg wash
- Make-ahead and freezer-friendly for meal planning
- Reliable, consistent results every time
- Perfect for holidays, family meals, and entertaining guests
Ingredients
For the Dough
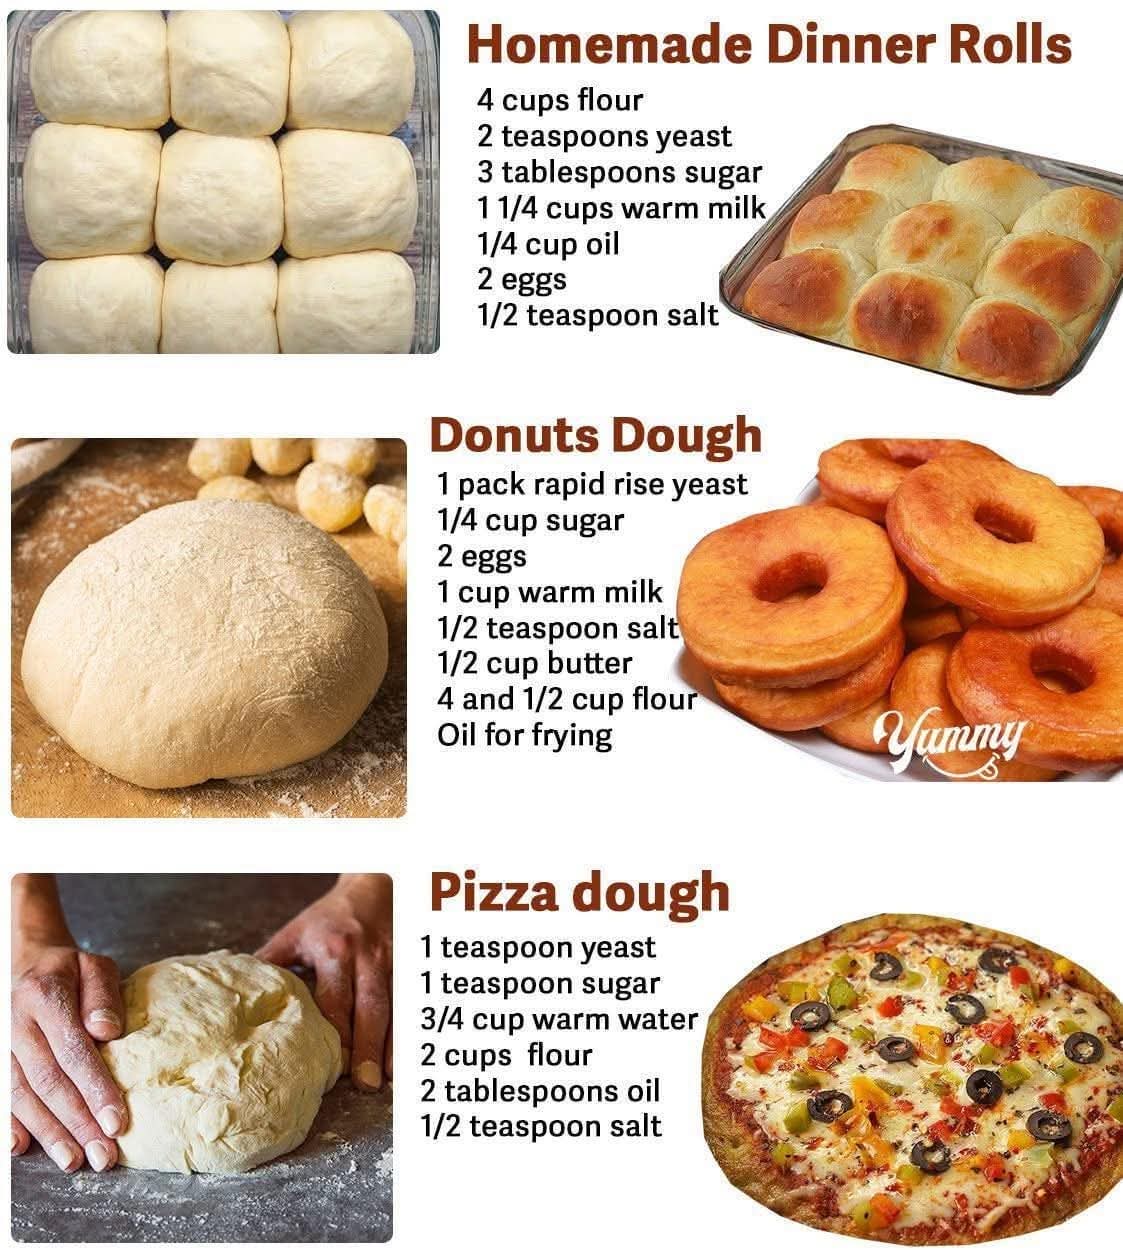
- 4 cups all-purpose flour, plus extra for dusting
- 2 teaspoons yeast
- 3 tablespoons sugar
- 1¼ cups warm milk (around 110°F)
- ¼ cup oil
- 2 eggs, room temperature
- ½ teaspoon salt
For Brushing
- 1 egg white + 2 tablespoons water (egg wash before baking)
- 2 tablespoons melted butter (for brushing after baking)
Directions
1. Activate the Yeast
In a mixing bowl, combine the yeast and sugar, then pour in the warm milk. Allow the mixture to rest for 5 minutes, or until it becomes foamy. This ensures the yeast is active and ready to help the dough rise.
2. Add Wet Ingredients
Whisk in the oil, salt, and eggs until the liquid mixture is smooth and well combined. This enriches the dough and contributes to the rolls’ soft texture.
3. Add the Flour
Begin adding the flour one cup at a time, mixing after each addition until a soft dough forms. Avoid adding too much flour at once to prevent a dense texture.
4. Knead the Dough
Transfer the dough to a lightly floured surface and knead for 5–7 minutes, until it becomes smooth, elastic, and no longer sticky. Proper kneading builds gluten, giving your rolls structure and softness.
5. First Rise
Place the dough into an oiled bowl, cover with plastic wrap, and let it rise in a warm place for 1 hour, or until doubled in size.
6. Shape the Rolls
Punch down the risen dough and divide it into 16–24 equal pieces depending on your preferred size. Roll each piece into a smooth ball and place them evenly in a greased baking pan.
7. Second Rise
Cover the pan lightly and allow the rolls to rest for another 30 minutes, until puffed and airy.
8. Prepare for Baking
Preheat your oven to 350°F (175°C). Brush the tops of the rolls with egg wash to achieve a glossy, golden crust.
9. Bake
Bake the rolls for 20–25 minutes, or until golden brown on top and cooked through. The tops should feel firm and lightly springy when tapped.
10. Add Final Gloss
Remove from the oven and immediately brush with melted butter. This adds shine, softness, and a rich buttery flavor.
Tips for Best Results
- Use fresh yeast for a strong, reliable rise.
- Warm the milk to the correct temperature; too hot can kill the yeast.
- Avoid adding excess flour while kneading to prevent dryness.
- For perfectly even rolls, weigh each dough ball with a kitchen scale.
- Allow enough rising time; under-proofing leads to dense rolls.
- Bake in the center of the oven for even coloring.
- For extra softness, cover warm rolls with a clean towel after baking.
Variations & Substitutions
- Whole Wheat Version: Replace up to 1½ cups of flour with whole wheat flour.
- Dairy-Free: Use plant-based milk and brush with oil instead of butter.
- Sweet Rolls: Add an extra tablespoon of sugar and finish with honey butter.
- Garlic Herb Rolls: Mix 1 teaspoon garlic powder and 1 tablespoon dried herbs into the dough.
- Buttery Rolls: Replace the oil with melted butter for a richer flavor.
Serving Suggestions
- Serve warm with soups, stews, or roasted chicken.
- Pair with breakfast spreads like jam, honey, or cream cheese.
- Use as slider buns for mini sandwiches at parties.
- Add to holiday dinners such as Thanksgiving or Ramadan iftars.
- Present in a lined bread basket for an elegant table appeal.
Storage & Reheating
- Refrigerator: Store rolls in an airtight container for up to 4 days.
- Freezer: Wrap baked rolls tightly and freeze for up to 3 months.
- Reheating: Warm rolls in the oven at 300°F (150°C) for 8–10 minutes, or microwave for 10–15 seconds for softening.
- Make-Ahead: Shape the rolls, refrigerate overnight, and bake the next day after a short rise.
Frequently Asked Questions
Why didn’t my dinner rolls rise properly?
This usually happens if the yeast is expired or the milk was too hot or too cold. Always check that the yeast foams during activation.
Can I make the dough ahead of time?
Yes, you can refrigerate the dough after the first rise. Shape the rolls the next day and allow them to rise before baking.
Can I use instant yeast instead of active yeast?
Yes. Instant yeast can be mixed directly into the flour, and rising times may be slightly shorter.
Why are my rolls dense instead of fluffy?
Too much flour or not enough kneading can result in dense rolls. Add flour gradually and knead until smooth and elastic.
Can I double the recipe?
Absolutely. This recipe scales well, especially for holidays or large gatherings.